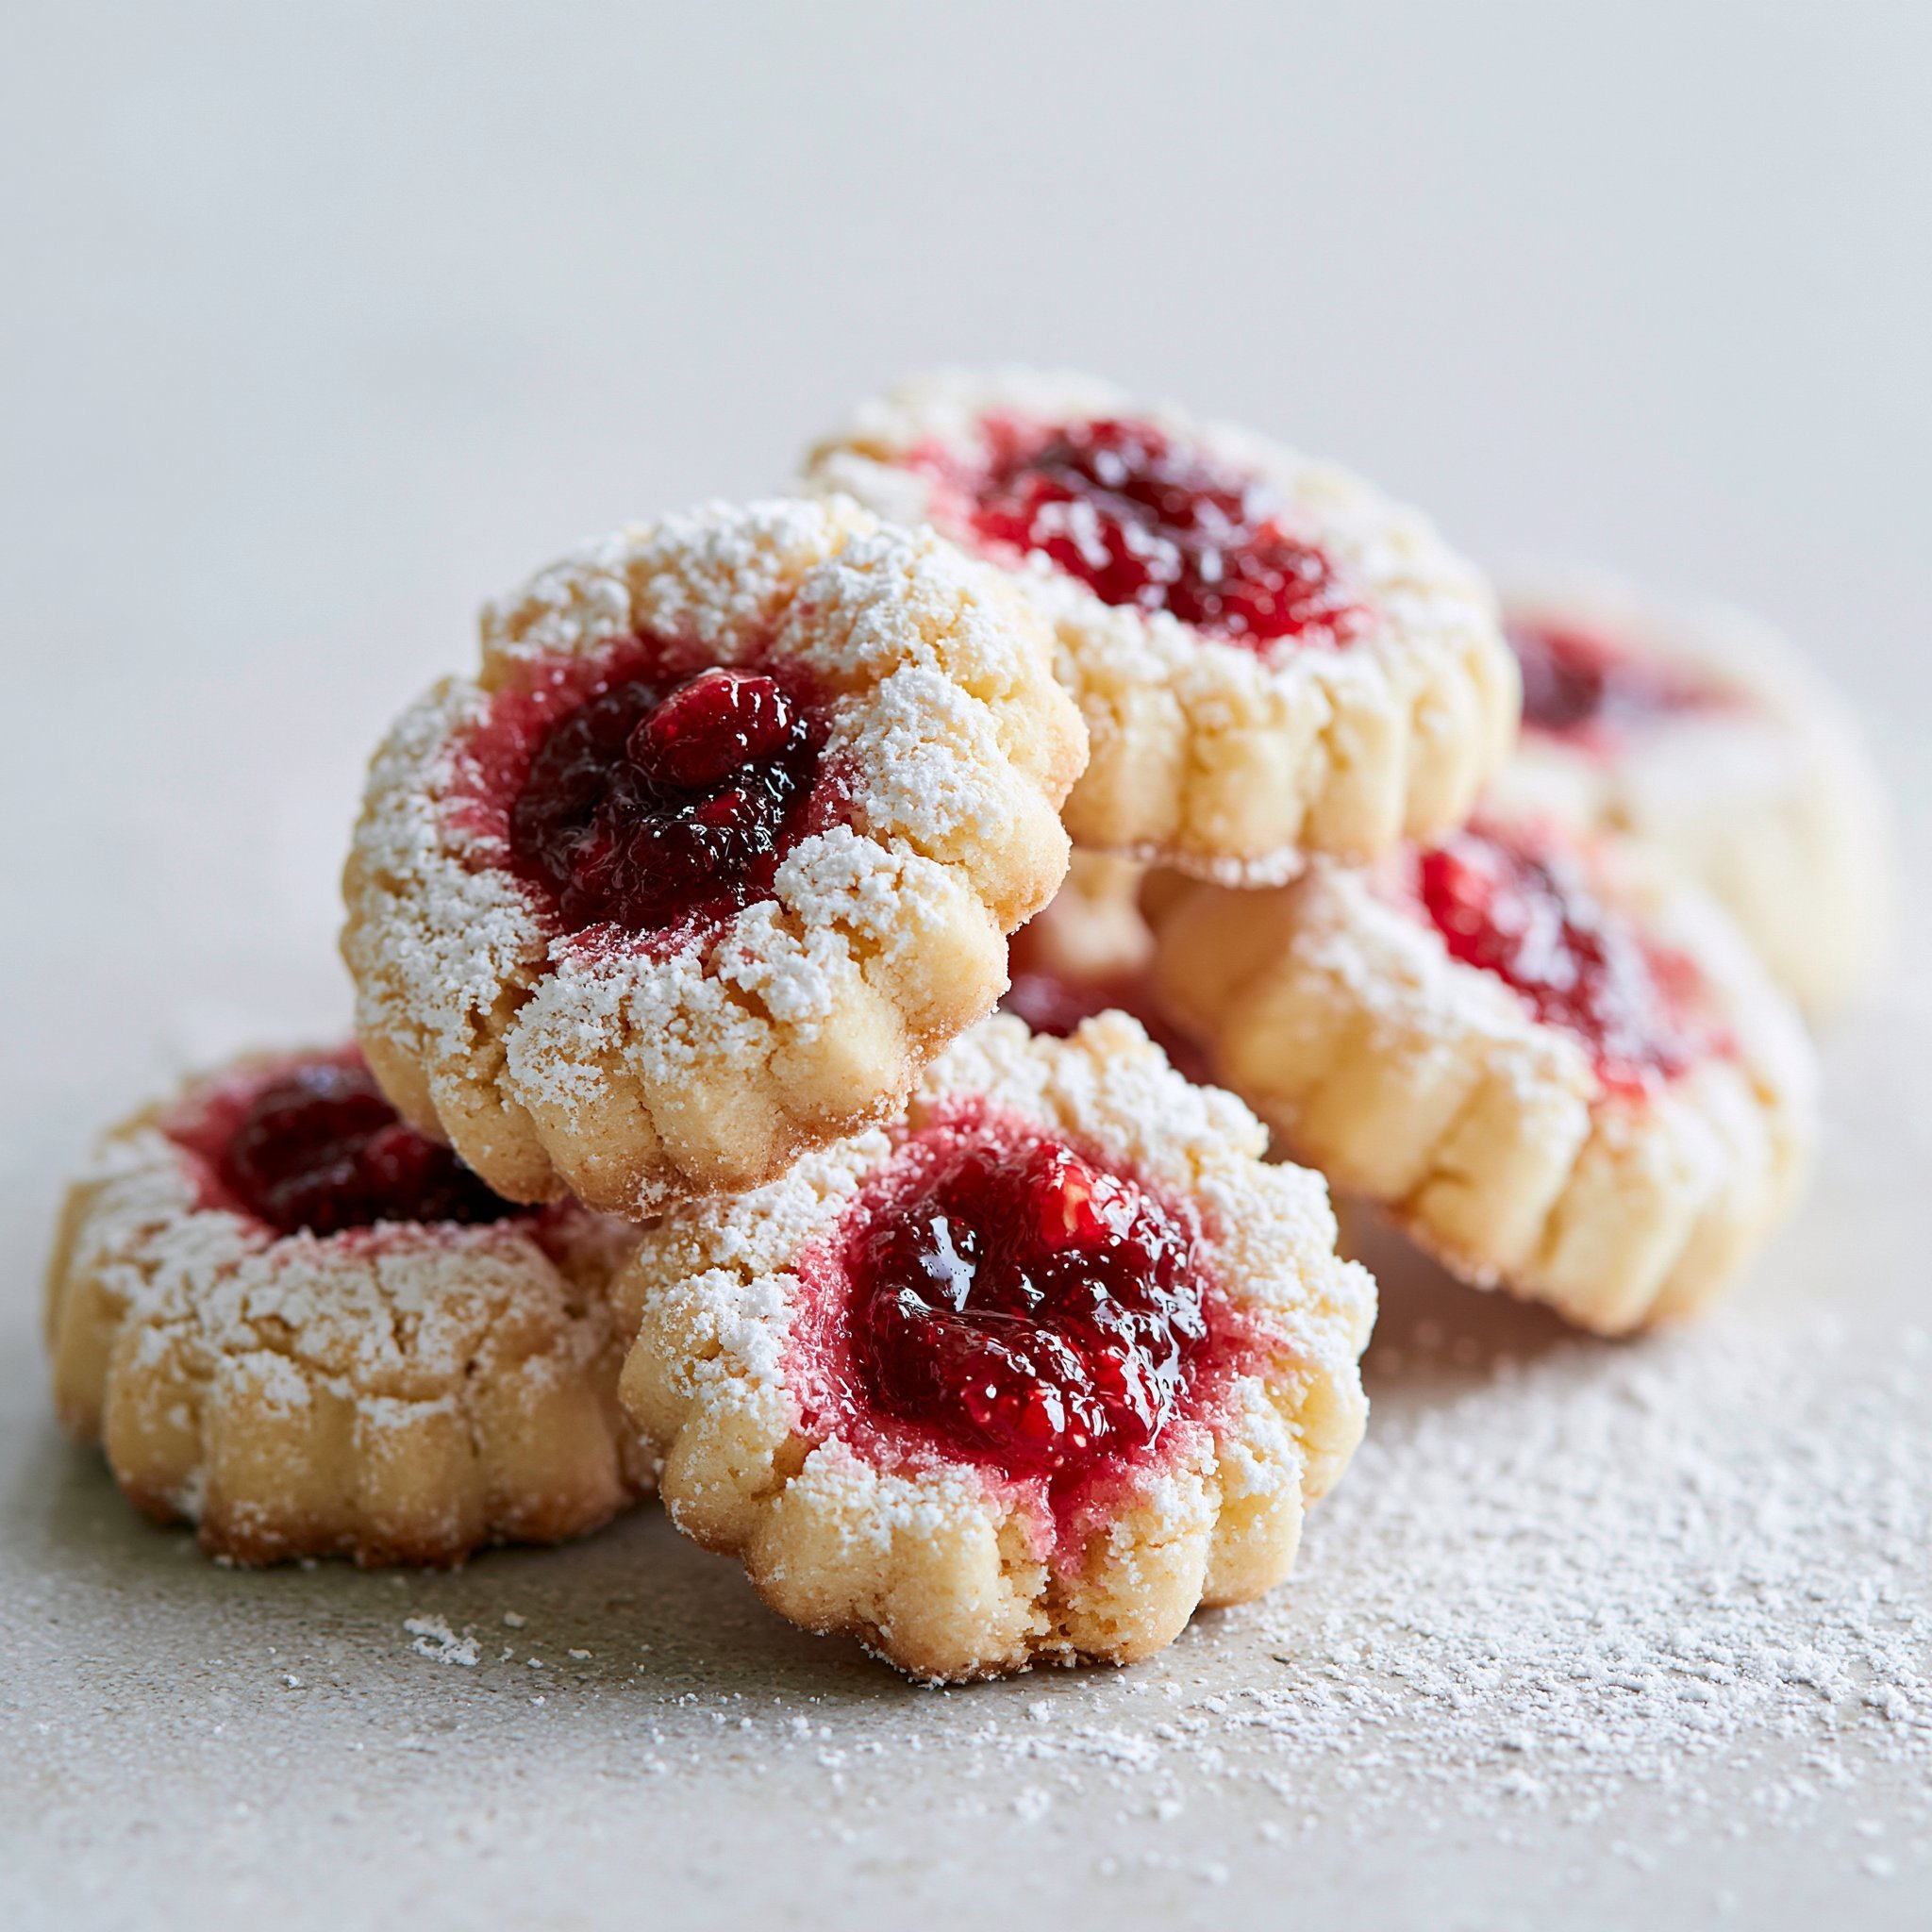
The moment these come out of the oven, you’ll notice it first: a soft vanilla-butter aroma and pale, tender cookies with just a hint of golden edging. Each one has a jammy center that stays glossy and bright—sweet, fruity, and a little floral if you use flower jam.
They’re also pleasantly low-fuss: one bowl for creaming, a quick mix-in of flour, then roll, press, and fill. If you’re in a cookie mood and want something different from chewy, snacky options like banana bread-style cookies, these thumbprints hit that bakery-pretty sweet spot without feeling complicated.
Why You’ll Love This Recipe
- The texture is classic thumbprint: tender and buttery with a soft bite, not dry or crumbly.
- Powdered sugar makes the dough smooth and fine-textured, so the cookies bake up delicate and neat.
- The jam center stays vibrant and glossy, giving you a pop of flavor in every bite.
- One egg yolk adds richness and helps the dough hold together well when you press the indent.
- They look special with almost no extra effort—especially with a few sprinkles or edible flowers on top.
The Story Behind This Recipe
I make these when I want a cookie that looks like it belongs on a spring dessert plate but still feels like a simple home bake—soft butter, powdered sugar, vanilla, and a spoonful of jam doing most of the work. It’s the same comforting “cookie + filling” idea I love in cozier flavors too, like cinnamon roll-inspired cookies, just with a brighter, fruit-forward finish.
What It Tastes Like
These taste like a vanilla-scented butter cookie with a plush, tender crumb and a sweet jam center that turns slightly sticky as it bakes. You get rich dairy notes from the butter, a gentle sweetness from powdered sugar (not grainy), and a fruity punch right in the middle—raspberry is tangy, apricot is mellow, and flower jam leans perfumed and delicate.
Ingredients You’ll Need
Softened butter is the key to a smooth, fluffy base—if it’s too cold, the dough won’t cream properly and the cookies can bake up dense. Powdered sugar keeps the texture fine and melt-in-your-mouth. The egg yolk adds richness and helps the dough bind without making it cakey. For the jam, choose something thick enough to sit neatly in the indent; if it’s very runny, it can spread more in the oven.
- 1 cup unsalted butter, softened
- 1 cup powdered sugar
- 1 egg yolk
- 2 teaspoons vanilla extract
- 2 cups all-purpose flour
- 1/4 teaspoon salt
- 1/2 cup fruit jam (e.g., raspberry, apricot, or flower jam)
- Sprinkles or edible flowers for decoration (optional)
How to Make Flower Jam Thumbprint Cookies
- Heat the oven and prep your pan. Preheat to 350°F (175°C) and line a baking sheet with parchment paper so the cookies lift cleanly and the bottoms stay pale and tender.
- Cream the butter and sugar until fluffy. In a mixing bowl, beat the softened butter with the powdered sugar until it looks lighter in color and airy, like a smooth buttercream. This step helps the cookies bake up delicate instead of heavy.
- Add yolk and vanilla. Beat in the egg yolk and vanilla extract until the mixture looks fully blended and creamy, with no streaks of yolk.
- Mix in dry ingredients gently. Add the flour and salt gradually, mixing just until a smooth dough forms. You’re looking for a dough that’s soft and cohesive—not dry and cracking, and not sticky like batter.
- Roll into balls. Scoop and roll the dough into small balls and place them on your prepared baking sheet with a little space between each (they’ll puff slightly as they bake).
- Make the thumbprints. Use your thumb to press an indent into the center of each dough ball. Aim for a tidy well with a sturdy rim so the jam has a place to sit.
- Fill with jam. Spoon a small amount of jam into each indent. Don’t overfill—just enough to dome slightly is perfect.
- Bake. Bake for 12–15 minutes, until the edges are lightly golden and the centers look set (the jam will look glossy and warm).
- Cool completely. Let the cookies cool on a wire rack. They’re delicate when hot, and the jam needs a bit of time to set.
- Decorate (optional). Once cool, finish with sprinkles or a few edible flowers for a pretty, giftable look.
Tips for Best Results
- Start with properly softened butter. It should press easily but still hold its shape; overly melty butter can make the dough greasy and the cookies spread more.
- Cream until the mixture looks lighter. That “paler and fluffier” visual cue matters—your cookies will bake up more tender.
- Press the indent before baking (and make it deep enough). A shallow thumbprint won’t hold much jam, and the center can puff back up.
- Use a thick jam. A sturdier jam stays neatly in the well and bakes up glossy rather than running over the sides.
- Let them cool fully before decorating. Warm jam looks set but is still loose; cooling keeps your sprinkles/flowers from sliding.
If you’re planning a mixed cookie platter, it’s fun to balance these with something totally different in texture, like crunchy peanut butter cornflake cookies.
Variations and Substitutions
- Swap the jam flavor: Raspberry for tart brightness, apricot for mellow sweetness, or flower jam for a delicate, perfumed center.
- Change the look: Add sprinkles right after baking (once the jam is still a touch tacky) or decorate after cooling for a cleaner finish.
- Vanilla emphasis: Keep the vanilla at the full amount listed—it’s what gives the buttery dough its warm, bakery-style aroma.
For a no-oven cookie option on the same week you bake these, I also love keeping no-bake peanut butter cookies in the mix for contrast.
How to Serve It
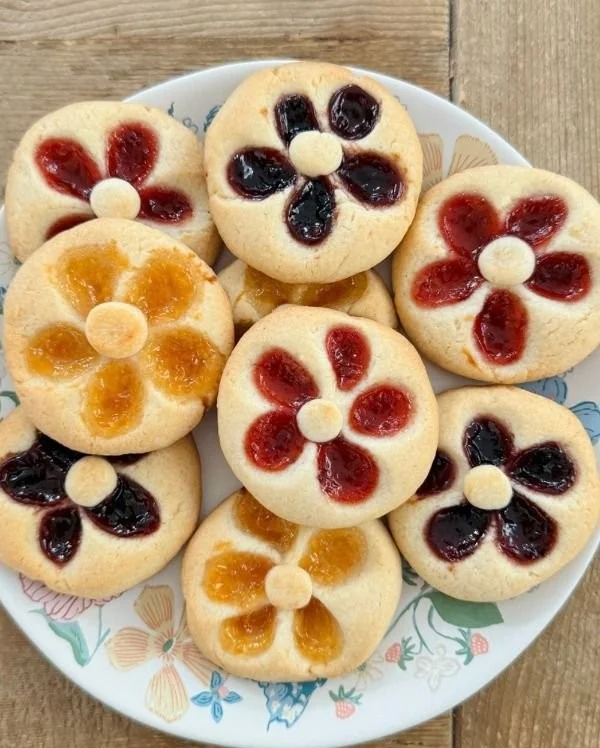
Serve these once completely cool so the jam center is set and glossy. I like arranging them on a plate with a mix of jam colors (raspberry + apricot looks especially pretty), then finishing with a few edible flowers for a simple “spring bakery box” vibe. They’re lovely with tea or coffee, and they travel well for a small treat drop-off.
How to Store It
Store thumbprint cookies in an airtight container at room temperature so the buttery cookie stays tender. If you stack them, do it gently—the jam centers can be a little tacky, especially on day one. For make-ahead ease, bake and cool completely before packing; the jam sets more neatly as it cools.
Final Thoughts
These Flower Jam Thumbprint Cookies are the kind of bake that looks polished but feels genuinely easy: a soft vanilla-butter cookie, a bright jam center, and just enough golden edge to tell you they’re done. Keep the butter properly softened, don’t overfill the wells, and you’ll have a batch that’s as pretty as it is satisfying.
Conclusion
If you’d like more thumbprint inspiration and shaping ideas, take a look at a kid-friendly flower jam thumbprint version for playful presentation. For a citrusy twist on the flower look, this flower thumbprint lemon cookie guide is a great reference. And for a classic, deep-dive approach to the technique, this thumbprint cookie walkthrough is a helpful comparison for timing and doneness cues.
Flower Jam Thumbprint Cookies
Ingredients
Method
- Preheat the oven to 350°F (175°C) and line a baking sheet with parchment paper.
- In a mixing bowl, beat the softened butter with the powdered sugar until fluffy and light in color.
- Add the egg yolk and vanilla extract, then beat until creamy and fully blended.
- Gradually mix in the flour and salt until a smooth dough forms.
- Scoop and roll the dough into small balls and place them on the prepared baking sheet.
- Press an indent into the center of each dough ball using your thumb.
- Fill each indent with a small amount of jam, just enough to dome slightly.
- Bake for 12–15 minutes until the edges are golden and the centers look set.
- Allow to cool on a wire rack before decorating if desired.